Pancetta Arrotolata (Home-cured pancetta)

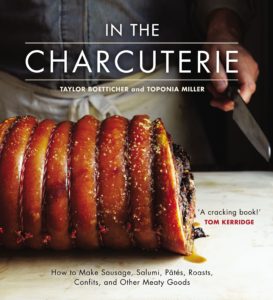
Learn how to make authentic Italian home-cured pancetta with this guide from the In The Charcuterie cookbook. A fascinating project for adventurous home cooks.
Introduction
Pancetta is a type of cured pork belly, but unlike its sweet and smoky American cousin bacon, Italian pancetta is air-dried after its initial cure. There are two basic types of pancetta, tesa and arrotolata. Pancetta tesa is flat, dried in its natural shape until it is so firm and dry that it can be eaten raw like prosciutto. Pancetta arrotolata is rolled, trussed and cured until just firm. Sliced or diced, it is the cured meat workhorse of the Italian kitchen, finding its way into tortellini and on to pizza, lending its delicately sweet porkiness to sughi, insalate, zuppe and verdure, and barding lean meats such as pork tenderloin with its ample fat, keeping them juicy and delicious during roasting. Start to finish, this pancetta will take a minimum of 4 weeks to prepare and cure. If you prefer a very firm pancetta, you can continue to let it hang for several more weeks.
Ingredients
| 1 | skinless, boneless pork belly, about 3.6kg, or slighly larger |
| For the cure mix: | |
| 1 tbsp | black peppercorns |
| 2 tsp | chilli flakes |
| 1 | dried bay leaf |
| 5 | allspice berries |
| 85g | fine sea salt |
| 1 tbsp | dextrose |
| 2 tsp | curing salt no. 2 |
| 1/4 tsp | freshly grated nutmeg |
Essential kit
You will need a meat hook.
Method
1. Trim and square off the pork belly so that it weighs about 3.6kg, give or take 30g. (Any trim can be saved for sausage or rillettes.) Lay the belly fat side down on a cutting board and pierce with the tines of a sausage knife, the pointy end of a trussing needle, or a sharp skewer, covering it completely with perforations roughly 1cm apart.
2. To make the cure mix, combine the peppercorns, chilli flakes, bay leaf and allspice in a spice grinder and grind finely. Transfer to a small bowl, add the sea salt, dextrose, curing salt, and nutmeg, and mix well to distribute the ingredients evenly.
3. Place the meat in a non-reactive pan or container large enough to hold it flat. Rub the cure all over both sides and all of the edges of the belly, making sure to work the cure in between any crevices. When all of the cure has been massaged into the meat, lay the belly fat side down in the container, cover, and refrigerate overnight.
4. The following day, flip the belly over so the fat side faces up, then leave it to refridgerate over a second night. Turn it once again the following day, recover it, return it to the fridge, and leave it undisturbed to cure for another 12 days.
5. After 12 days, use a meat hook to hang the belly in the fridge (or other cold location) for 2 days to dry further. Place a pan or shallow bowl underneath to catch any dripping juices.
6. When it is dry, remove the belly from the fridge and let it sit at room temperature for about 3 hours, until it is soft and malleable. Cover a large cutting board with cling film and lay the belly meat side up, on top. Place another layer of cling film on top of the belly. Using a heavy meat tenderiser, rubber mallet, or rolling pin, pound the pancetta thoroughly, evenly, and without mercy for a full 5 minutes, until it is more pliable and easy to roll.
7. To roll and tie the pancetta, lay the belly, meat side up, with its longest side closest to you. Fold the first 5cm of the side closest to you over on to itself and press down firmly. Continue to roll and press, making sure to eliminate any air gaps that can result in unwanted mould on the inside of the pancetta. When the belly is completely rolled, tie it as tightly as possible with butcher’s twine as you would a roast (see how here), then rehang it in the fridge for another 2 weeks or until it is firm to your liking.
8. Pancetta keeps best when left whole or in large pieces. Slice off only what is to be cooked and tightly wrap the unused portion in cling film. It will keep well in the fridge for 3-4 weeks or in the freezer for up to 6 months.
Reviews
Have you tried this recipe? Let us know how it went by leaving a comment below.
Please note: Moderation is enabled and may delay your comment being posted. There is no need to resubmit your comment. By posting a comment you are agreeing to the website Terms of Use.