Fitwaffle’s Chocolate Egg Cheesecake
Perfect for a low-effort Easter dessert, this no-bake cheesecake can be whipped up in advance and stored in the fridge until ready to be served.
From the book
Buy From
Introduction
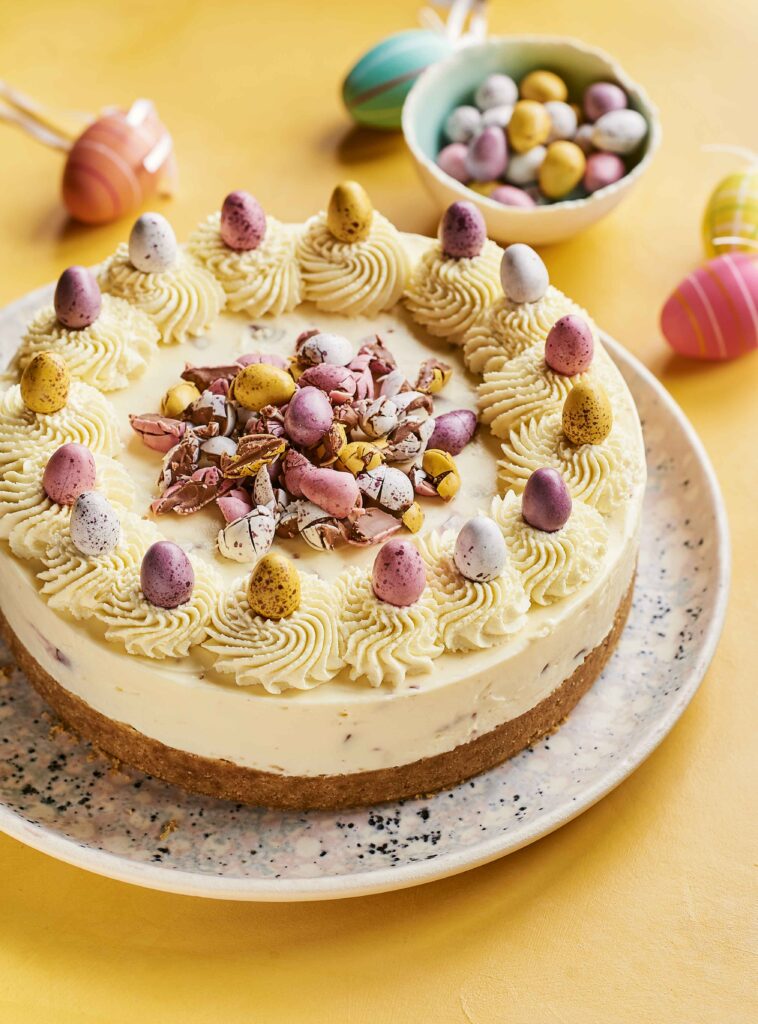
The perfect Easter dessert, this Easter egg cheesecake has a buttery biscuit base, a creamy vanilla cheesecake filling, is packed with crushed chocolate eggs and topped with sweet whipped cream and lots and lots of colourful chocolate eggs.
Ingredients
| For the base: | |
|---|---|
| 350g (12.4oz) | digestive biscuits (or graham crackers) |
| 180g (6oz) | salted butter, melted |
| For the filling: | |
| 400ml (1⅔ cups) | cold double (or heavy) cream |
| 500g (1lb) | full-fat cream cheese, at room temperature |
| 120g (1 cup) | icing (powdered) sugar |
| 2 tsp | vanilla extract |
| 100g (3.5oz) | mini eggs, crushed |
| For the topping: | |
| 150ml (⅔ cup) | cold double (or heavy) cream |
| 30g (4 tbsp) | icing (powdered) sugar |
| 150g (5.25oz) | mini eggs, 16 kept whole, the remaining chopped |
Essential kit
You will need a 20cm (8in) round springform cake tin and an electric hand mixer.
Method
FOR THE BASE:
Line the bottom of a 20cm (8in) round springform cake tin with a circle of nonstick baking paper.
Put the biscuits into a food processor and process until finely crushed. Alternatively, put them into a plastic bag and crush with a rolling pin. Tip into a large mixing bowl, then pour in the melted butter and mix with a spoon until fully combined. Press the mixture firmly into the bottom of your prepared tin with the back of a spoon, then pop into the refrigerator while you make the filling.
FOR THE FILLING:
In a large mixing bowl, whip the cream with an electric hand mixer until stiff peaks form. In a separate large bowl, beat together the cream cheese, icing (powdered) sugar and vanilla extract with the electric mixer until just combined.
Fold in the whipped cream with a rubber spatula until just combined, then fold in the crushed mini eggs. Be careful not to overmix as this can make the cheesecake go runny.
Remove the chilled base from the refrigerator, then spoon in the filling, smoothing it out to the edges and pressing it down onto the base to avoid any gaps. Chill in the refrigerator for at least 6 hours, or overnight, if possible, until completely set.
FOR THE TOPPING:
Remove the cheesecake from the tin and transfer onto a serving plate. Whip the cream and icing sugar to stiff peaks using an electric mixer and transfer into a piping bag with your favourite piping nozzle.
To decorate, pipe 16 swirls of cream around the edge of the cheesecake and place a whole mini egg on top of each. Place the chopped mini eggs in the middle of the cheesecake (see the photo for inspiration).
Store in the refrigerator for up to 3 days.
Reviews
Have you tried this recipe? Let us know how it went by leaving a comment below.
Thank you for your rating. Our team will get back to any queries as soon as possible.
Please note: Moderation is enabled and may delay your comment being posted. There is no need to resubmit your comment. By posting a comment you are agreeing to the website Terms of Use.
