Curly Wurly
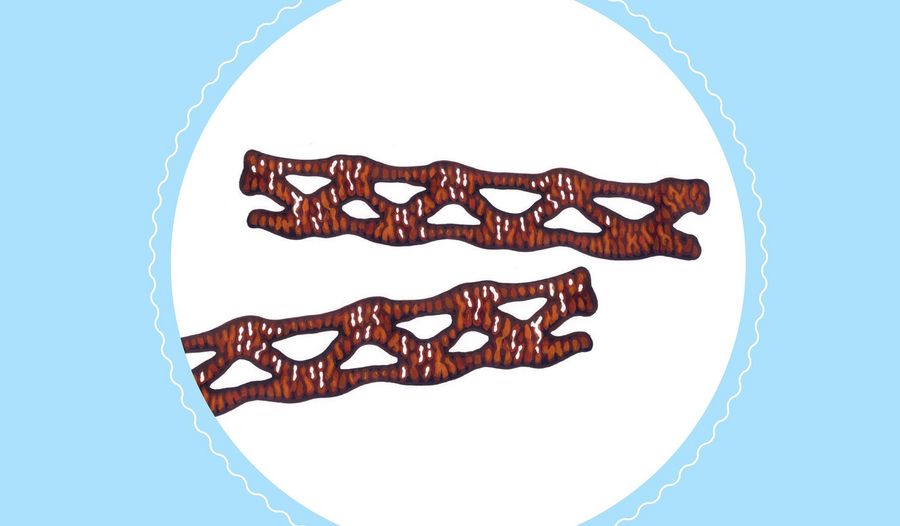
Ever wanted to recreate the classic Curly Wurly at home? This recipe, from Adele Nozedar, shows you how to rustle up some homemade curly wurly chocolate bars.
Introduction
When you think about it, there’s not really an awful lot to many of our best sweets in terms of raw materials. Humbugs, for example? Bah. They’re just boiled sugar and flavouring. The components of the Curly Wurly, a long, narrow bar made from plaited hard toffee, coated in chocolate might ‘only’ be chocolate and toffee, but in this case, it’s the artful and ingenious arrangement of simple ingredients that makes this British sweet truly great. The Curly Wurly wouldn’t be either Curly or Wurly without its characteristic shape.
David John Parfitt, an experienced confectioner working at Cadbury’s in Birmingham, came up with the concept and design for the Curly Wurly in 1970 while faffing about with bits of spare toffee. However, putting the bar into factory production was tricky because of the fiddly joins in the centre of the bar. Fortunately, Birmingham’s great tradition in industry and engineering made it the right place for this conundrum to be solved. Step up one William (Bill) Harris. It was Bill who perfected the complex piece of machinery needed to weave the toffee strands together. The early machine could weave together eight ropes of toffee, but in 1982 ambitious executives from Cadbury’s commissioned a bigger, better piece of equipment, designed to boldly go where no other toffee-knitting machine had gone before … Perfection was subsequently improved upon when a machine was built that could make not eight, not sixteen, but twenty-four ropes of glittering, golden toffee, allowinglots of bars to be made at the same time. The gloriously named Twenty- Four Rope Extruder was the brain child of Tony Wright for the Harvey Design Company.
The best way to eat a Curly Wurly, I think, is to pop it in the freezer for a couple of hours. Then, leaving the wrapper intact, rap it sharply against the edge of the kitchen table. On unwrapping the treasure you should find that a pile of chocolate shrapnel has fallen away from what is now a lattice of nude toffee, legs all crossed to preserve modesty. Naughty!
The beauty of the method I have devised here is that you can make your own version of a Curly Wurly as big as you like! It is based on a simple pulled-toffee technique since, sadly, I didn’t have access to a Twenty-Four Rope Extruder.
The only tricky bit, if your predilection is for a REALLY HUGE Curly Wurly, is how to coat it in the chocolate. You will need to find a tray that is as close as possible in size to your completed toffee. The quantities given here will make two Curly Wurlies of approximately 30 x 8cm, or a single whopper of 50 x 15cm, depending on how finely you pull the toffee.
Ingredients
| 225g | demerara sugar |
| 175g | golden syrup |
| 100g | unsalted butter |
| 2 tbsp | warm water |
| 2 tsp | liquid glucose |
| vanilla flavouring (optional) | |
| 400g | chocolate (plain, milk or white) |
| baking tray large enough to accommodate your chosen size of Curly Wurly | |
| buttered scraping tool |
Method
Put all the ingredients for the toffee, apart from the flavouring, into a heavy-bottomed pan, attaching your sugar thermometer to the inside. Over a low heat, stir the contents until the sugar has dissolved.
Bring to the boil, without stirring and heat to 130°C (hard ball stage). Immediately remove the pan from the heat. Pour the toffee carefully into the tray and leave to cool for a few moments.
When the toffee has started to set at the edges of the tray, take your scraping tool and scoop the edges of the toffee into the centre. Repeat until cool enough to handle, then begin to pull and twist the ball of toffee into a long rope of about 5mm thick. As you do so, it will become paler in colour and creamy in texture. With practice, making ropes of regular thickness will become easier.
Divide the toffee into three roughly equal strands (if you have a manufactured Curly Wurly to hand, copy it). Use one strand to form a rectangular ‘frame’, sticking it together in one corner. Then, starting in the top left-hand corner, zigzag the second strand down and across the frame all along its length, finishing in the bottom right-hand corner. Repeat the design the other way up with the third strand of toffee, starting from the top right-hand corner. Where the toffee overlaps, press it down to seal it. If, during the construction process, the toffee has started to set and the pieces refuse to glue together, heat the tip of a knife in hot water and use it to soften the junctions; they will stick down nicely. Set aside in a cool place for 15 minutes or so, until the toffee is completely firm.
Melt the chocolate in a bain marie and then, depending on the size of your toffee lattice(s), either dip it in the chocolate, brush it on, or coat it on with a spoon. Leave the chocolate coating to set before you turn the Curly Wurly over to coat the underside.
Reviews
Have you tried this recipe? Let us know how it went by leaving a comment below.
Thank you for your rating. Our team will get back to any queries as soon as possible.
Please note: Moderation is enabled and may delay your comment being posted. There is no need to resubmit your comment. By posting a comment you are agreeing to the website Terms of Use.