Meringue Rainbow Cake
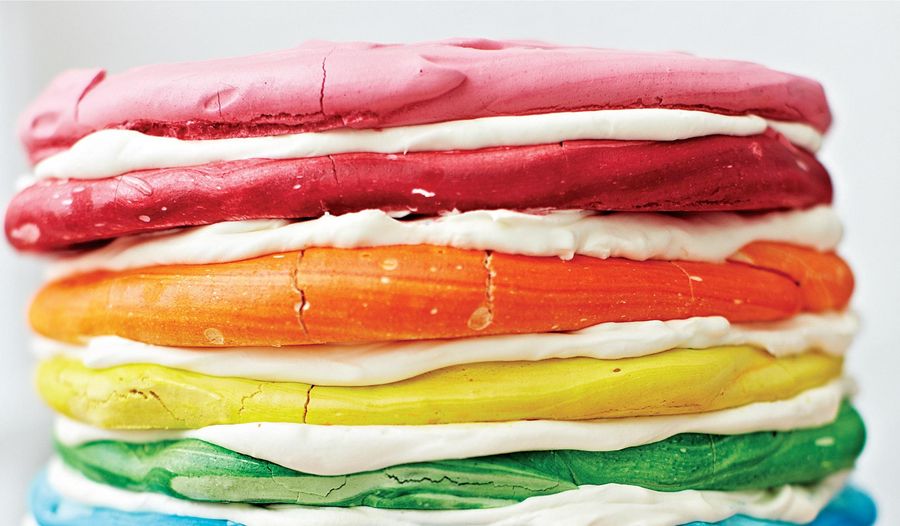
This impressive rainbow cake from The Meringue Girls is made entirely of brightly coloured meringue. This makes quite the showstopper for any party.
Introduction
The mother of all rainbow cakes, this epic bright meringue layer cake takes a bit of work, but is worth it. We’ve suggested making this in 2 batches so that it fits in the oven. Make a batch of meringue mixture at a time. Use the first batch to make red, orange and yellow discs, and the second batch to make green, blue and purple discs. To achieve a real popping colour, we advocate using man- made food dyes (Wilton’s Gels work really well). The trick to bright disc edges is to cover the inside of each piping bag halfway up with each disc colour. If you just colour the mixture without piping you won’t get the vibrant colour but you will still get a nice pastel shade. We’ve flavoured the discs with vanilla seeds, but you can choose any kisses flavourings.
Ingredients
| 2 | batches of uncooked Meringue Girls Mixture (see recipe link in method below) |
| Wilton’s Gels food colouring (red, orange, yellow, green, blue and purple) | |
| Seeds scraped from 2 vanilla pods | |
| 500ml | double cream |
| Smarties, to decorate (optional) |
Essential kit
You will need 3 piping bags
Method
Preheat your oven to 100°C/gas ¼, and line 3 baking sheets with baking paper.
Make your first batch of meringue mixture using the recipe here, and fold through the seeds of one of your vanilla pods, and then thickly paint the inside of three piping bags with your first three rainbow colours – red, orange and yellow. Fill the piping bags evenly and then pipe a 10 inch circle on each baking sheet, starting from the outside of the circle and snailing inwards to the very centre.
When you have finished, gently smooth the top of the discs to get rid of the swirly effect, until you have beautiful flat 1-inch thick discs. While the first discs are cooking, repeat the process to make green, blue and purple discs.
Bake for 1 hour, or until the meringue discs easily lift off the baking paper with their bases intact. Leave to cool on the baking sheets.
Keep all discs in an airtight container or carefully wrapped in cling film for up to 2 weeks, until you are ready to use.
When ready to serve, whisk the double cream until it just holds its peaks. Stack the meringue discs on a cake stand, alternating the colours and spreading layers of whipped cream in between each one. Decorate with Smarties if you’re feeling extra colourful.
Reviews
Have you tried this recipe? Let us know how it went by leaving a comment below.
Thank you for your rating. Our team will get back to any queries as soon as possible.
Please note: Moderation is enabled and may delay your comment being posted. There is no need to resubmit your comment. By posting a comment you are agreeing to the website Terms of Use.
