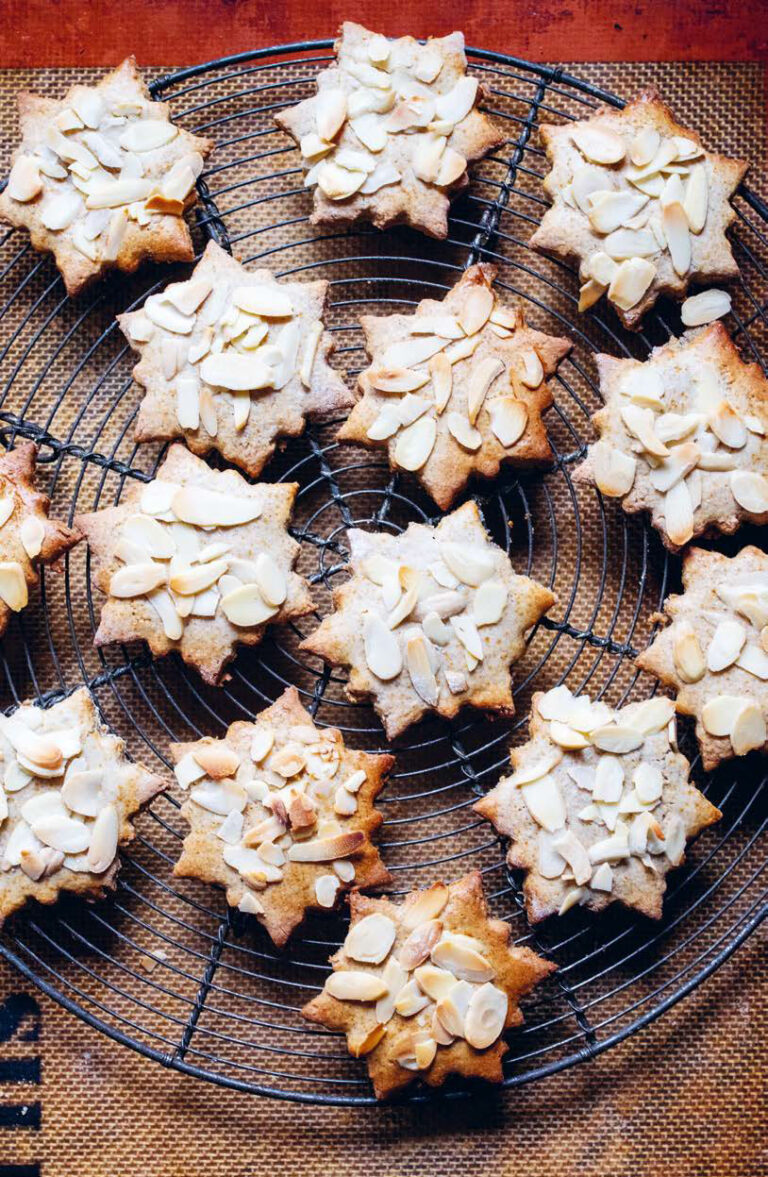
Frangipane Mince Pies


From the book

Pastry

A masterclass in all things pastry

Inspired ideas for homemade gifts

Stunning savoury and sweet recipes
Buy From
Introduction
I had never seen anything like mince pies when I was growing up in France, but I absolutely love them. My only complaint is that they are often made with too much pastry in relation to the filling, so one Christmas I experimented with covering the pies instead with frangipane (almond cream) flavoured with rum and topped with flaked almonds. They went down such a treat that we now make batches of them to sell in our bakery in Bath, and also in the Saturday shop at the cookery school, and I can barely keep up with the demand.
The baked pies can be made 2–3 months in advance and frozen between layers of greaseproof paper in a plastic freezer box until Christmas. They can then be defrosted and warmed at 170ºC/Gas 3 for 6–7 minutes to heat through, or eaten at room temperature.
Ingredients
| For the sweet pastry: | |
| 350g | flour |
| 125g | butter |
| 125g | sugar |
| 2 | eggs plus one yolk |
| pinch of salt | |
| For the almond cream: | |
| 250g | unsalted butter |
| 250g | caster sugar |
| 250g | ground almonds |
| 50g | flour |
| 3 | eggs |
| 2 tbsp | Poire William liqueur or rum, or equivalent |
| 1 x 400g | jar luxury mincemeat |
| Flaked almonds, to decorate (optional) | |
| Icing sugar, to dust | |
| Butter or baking spray, for greasing the tins |
Essential kit
You will need three 12-hole tart tins.
Method
Make the pastry, then rest it in the fridge for at least 1 hour, preferably several, or, better still, overnight.
To make the dough by hand: measure out all your ingredients before you start, and break your 2 eggs into a small bowl– there is no need to beat them. Separate the remaining egg. Put the flour and salt into a mixing bowl.
Now for the cold butter. What I do is take it straight from the fridge and put it between two pieces of greaseproof paper or butter wrappers (I always keep butter wrappers to use for this, as well as for greasing tins and rings), then bash it firmly with a rolling pin.
The idea is to soften it while still keeping it cold. I end up with a thin, cold slab about a centimetre thick that bends like plasticine. Put the whole slab into the bowl of flour – there is no need to chop it up.
Cover the butter well with flour and tear it into large pieces.
Now it’s time to flake the flour and butter together – this is where you want a really light touch. With both hands, scoop up the flour-covered butter and flick your thumbs over the surface, pushing away from you, as if you are dealing a pack of cards.
You need just a soft, skimming motion – no pressing or squeezing – and the butter will quickly start to break into smaller pieces. Keep plunging your hands into the bowl, and continue with the light flicking action, making sure all the pieces of butter remain coated with flour so they don’t become sticky.
The important thing now is to stop mixing when the shards of butter are the size of your little fingernail. There is an idea that you have to keep rubbing in the butter until the mixture looks like breadcrumbs, but you don’t need to take it that far. When people come to my classes, I find they can’t resist putting their hands back into the bowl to rub it just a little bit more, but if you want a light pastry, it is really important not to overwork it. If the mixture starts to get sticky now, imagine how much worse it will be when you start to add the liquid at the next stage. Add the sugar at this point, mixing it in evenly.
Tip the eggs, and the extra yolk, into the flour mixture and mix everything together.
You can mix with a spoon, but I prefer to use one of the little plastic scrapers that I use for bread-making. Because it is bendy, it’s very easy to scrape around the sides of the bowl and pull the mixture into the centre until it forms a very rough dough that shouldn’t be at all sticky.
While it is still in the bowl, press down on the dough with both thumbs, then turn the dough clockwise a few degrees and press down and turn again. Repeat this a few times.
With the help of your spoon or scraper, turn the pastry onto a work surface.
Work the dough as you did when it was in the bowl: holding the dough with both hands, press down gently with your thumbs, then turn the dough clockwise a few degrees, press down with your thumbs again and turn. Repeat this about four or five times in all.
Now fold the pastry over itself and press down with your fingertips. Provided the dough isn’t sticky, you shouldn’t need to flour the surface, but if you do, make sure you give it only a really light dusting, not handfuls, as this extra flour will all go into your pastry and make it heavier.
When you flour your work surface, you need to do this as if you are skimming a stone over water, just paying out a light spray of flour. (Funny as it seems, people in my classes actually practise this, like a new sport.) You need just enough to create a filmy barrier so that you can glide the pastry around the work surface without it sticking.
Repeat the folding and pressing down with your fingertips a couple of times until the dough is like plasticine, and looks homogeneous.
Finally, pick up the piece of pastry and tap each side on the work surface to square it off so that when you come to roll it, you are starting off with a good shape rather than raggedy edges.
To make the dough with a food mixer:
Put the flour and salt into the bowl of the machine. Bash the butter as described in the hand-mixing method, then break it into four or five pieces and add it to the flour. Using a paddle attachment rather than a hook or whisk, mix the ingredients at a slow speed until the pieces of butter are about the size of your little fingernail. You will need to scrape the butter from the paddle a few times as it will stick. Add the sugar at this point and mix in well. Add the eggs, and yolk, and mix very briefly, until a dough forms. As soon as it does, turn it out onto your work surface with the help of your scraper and follow the hand-mixing method.
To make the dough with a food processor:
It is very easy to overwork pastry in a food processor, so be very careful. Put the flour and salt into the bowl of the machine. Cut the cold butter into small dice and add to the bowl. Use the pulse button in short bursts so that the flour just lifts and mixes, lifts and mixes. You don’t want to blitz everything into a greasy ball as that will result in hard, dense pastry. Add the sugar at this point and mix in well. Add the eggs, and yolk, then pulse briefly until the pastry dough comes together. Turn it out with the help of your scraper and follow the hand-mixing method.
Lightly grease three 12-hole tart tins (if you don’t have enough tins, bake in batches). Lightly flour a work surface and roll out the pastry 2–3 mm thick. Using a round cutter or tumbler just larger than the holes in the tin, cut out circles of pastry and use to line your tins. Put into the fridge to rest for 30 minutes.
To make the almond cream, beat the butter until very soft, preferably in a mixer. With the motor running, add the sugar and ground almonds and mix some more. Now mix in the flour, then the eggs, and finally the alcohol. Transfer to a small bowl and put in the fridge for 15 minutes.
Preheat the oven to 180°C/Gas 4. Half-fill the pastry cases with mincemeat, then pipe about a heaped teaspoon of almond cream over each one. (Alternatively, spoon it on and smooth over the top.) Sprinkle with a few flaked almonds if you like.
Bake for about 25 minutes, until golden brown. Leave in the tins for about 15 minutes, then lift out and cool on a rack. Dust with icing sugar.
Reviews
Have you tried this recipe? Let us know how it went by leaving a comment below.
Our team will respond to any queries as soon as we can - this may take longer over weekends. You do not need to resubmit your comment.
Please note: Moderation is enabled and may delay your comment being posted. There is no need to resubmit your comment. By posting a comment you are agreeing to the website Terms of Use.