Gingerbread House
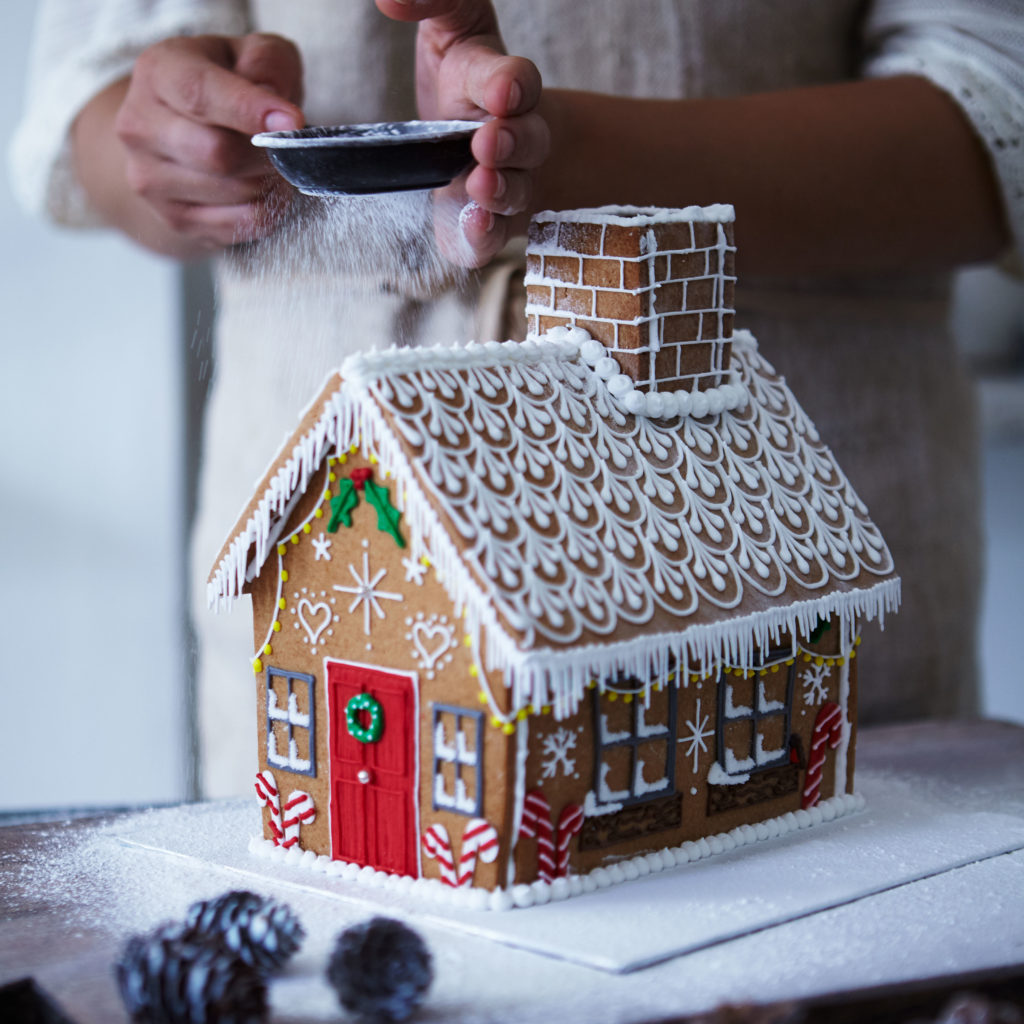
This decorative Gingerbread House from luxury biscuit-makers Biscuiteers is truly a baking masterpiece. It’s a wonderful family project for the Christmas holidays, and makes a spectacular edible gift.

From the book

Biscuiteers Book of Iced Gifts

Decorative biscuits for every occasion

Inventive ideas for biscuits and cakes

Fun family projects and gifts to bake at home
Buy From
Introduction
A great project for the whole family to get stuck into on Christmas Eve. Why not attempt a whole gingerbread village if you have aunties, uncles and cousins visiting?
Ingredients
| For the biscuit dough: | |
| 170g | caster sugar |
| 170g | salted butter |
| 170g | golden syrup |
| 1 | large egg |
| 520g | plain flour |
| 80g | self-raising flour |
| 1½ tsp | mixed spice |
| For the royal icing: | |
| 150ml | cold water |
| 900g | royal icing mix |
| To decorate: | |
| Edible decorations and sprinkles of your choice |
Essential kit
You will need: an electric mixer, an electric whisk, a piping bag cut at an angle, a cake board.
Method
For the biscuit dough:
1. Put the sugar, butter, golden syrup and egg into a large mixing bowl. Mix with an electric mixer on a low speed for 3 minutes, until there are only small lumps of butter visible, then turn the speed of the mixer up to medium for 1 minute to reduce the size of the butter lumps.
2. Sift both types of flour and the mixed spice into the bowl and mix on a low speed for 1 minute, or until combined, then turn the mixer up to medium speed for 30 seconds, or until the dough clings together and the sides of the bowl are clean.
3. Turn the dough out onto a clean work surface. Divide into two and squash into even, flat discs. Cover with cling film and chill, or use immediately.
For the royal icing:
1. Combine the ingredients in a mixing bowl, adding the liquids first – add 100ml water to the bowl to start with. Add the dry ingredients and whisk for 5 minutes with an electric whisk, or for longer with a wooden spoon. Whisk slowly initially, to avoid clouds of icing sugar!
2. Continue whisking, gradually adding more water, until you achieve the desired consistency – a smooth, bright white paste, which is the thickness of toothpaste (you may need to use less or more water than the recipe states – go slowly and judge when you’ve reached the correct point).
3. Use immediately, or cover with cling film and chill, for no longer than 24 hours.
Cook’s tip: we use a piping bag cut at an angle at the tip to achieve the thin, crisp line in line icing.
For the gingerbread house:
1. Draw out a template for your gingerbread house.
You can make the house as large or small as you like, but here are the basics for working out the dimensions: On a sheet of paper, use a pencil and ruler to mark out 2 long slim rectangles (sides of the house), 2 wider rectangles of the same length (roof of the house) and 2 squares that come up to a triangle point (ends of the house). The width of the squares should be the same as the short sides of your side pieces and the apex of the triangle should meet where 2 sides of the same width as your roof pieces meet. Cut out your paper templates with scissors and set to one side.
2. Line a baking tray with greaseproof paper. Preheat oven to 150°C/130° fan/gas mark 2.
3. Place the biscuit dough between 2 sheets of greaseproof paper, then flatten the dough into a disc.
4. Using a rolling pin, roll the dough out to an even thickness of about 1cm.
5. Remove the top layer of greaseproof paper. Lay your templates onto the dough and, using a sharp knife, carefully cut around each template (leftover dough can be used to make Christmas trees or something else to decorate the house!).
6. Use a palette knife to lift and transfer the cut-out dough shapes to the lined baking tray. Bake in the hot oven for 20–30 minutes, or until the biscuits look golden brown.
7. Remove from the oven and carefully transfer the sheet of greaseproof paper with the biscuits on it to a cooling rack. Allow the biscuits to cool.
8. When your biscuits are completely cool, it’s time to decorate and assemble your house. It’s best to decorate the house before assembly, so that the decorations can dry flat.
TOP TIP – Draw your decorative design onto paper before you start icing onto the biscuits.
9. Use line icing to pipe decorative roof tiles, window panes and snowflakes. Leave to dry for 30 minutes. To stick decorations to the house, pipe a small dot of line icing to the back of the decoration and gently press it onto the biscuit.
10. Once your decorated pieces are dry, you are ready to put the house together. To start, pipe a thick line of line icing along the bottom and edges of the front piece, do the same for both the side pieces. Stick them together, on the cake board base, and hold for a few minutes, until the pieces feel set. They will take about 15 minutes to fully set, so prop them up with some glasses or mugs, to hold them steady while they dry.
11. Pipe a thick line of icing along the bottom of the back piece and along the edges of the side pieces, then attach the back piece to the cake board and back edges of the house. Allow to set as before.
12. To assemble the roof, you need to pipe a line of icing along the top edges of the house, then stick the roof pieces to the top of the house. They will need to be assembled one at a time and held in place for 10–15 minutes, so the icing has time to set.
13. To finish, ice the space in-between the two roof pieces at the top of the house. Allow to fully set.
14. If wished, you can also cut out, bake and decorate a chimney to stick to the top of the roof. You will need to cut out 4 rectangles, then cut 2 triangle shapes out of the bottom of 2 of them. Stick together as above, then stick to the top of your house, icing around the base to cover the join.
Reviews
Have you tried this recipe? Let us know how it went by leaving a comment below.
Our team will respond to any queries as soon as we can - this may take longer over weekends. You do not need to resubmit your comment.
Please note: Moderation is enabled and may delay your comment being posted. There is no need to resubmit your comment. By posting a comment you are agreeing to the website Terms of Use.