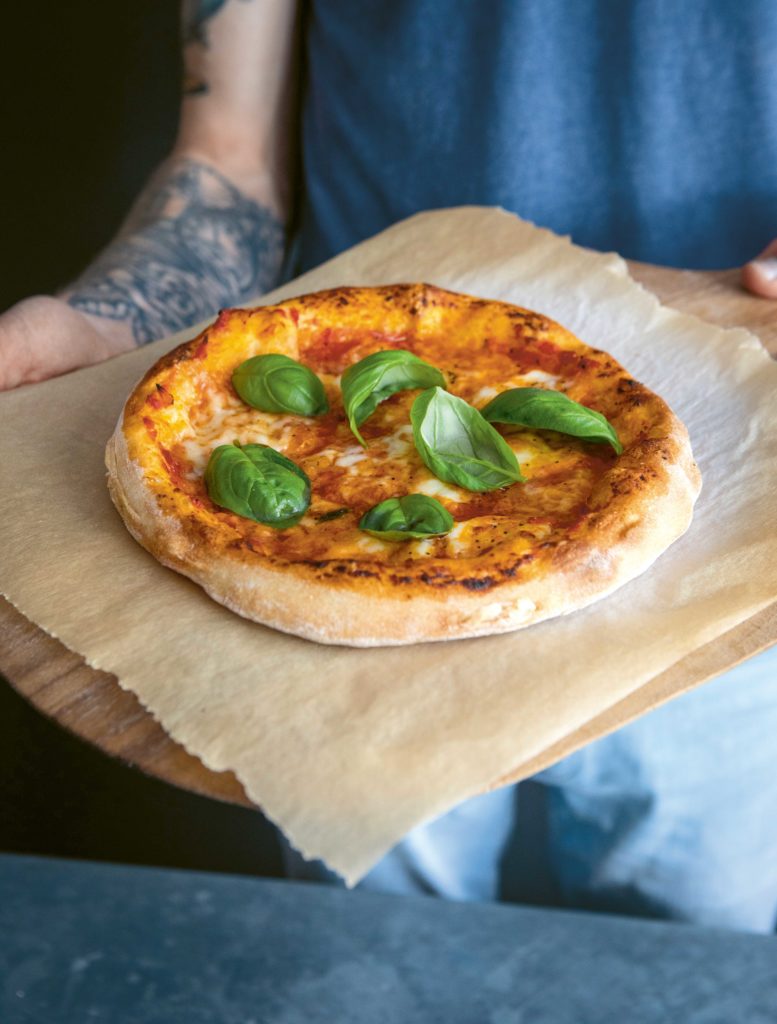
For me, there are two essential elements to making amazing pizza at home. The first is that you really can’t substitute stone baking. When you slide a pizza onto a hot stone in the oven, the heat will make immediate contact with the dough, sealing off the base and making it crispy as well as inflating the crust nicely. It can be a little tricky to do, with the trickiest part of all manoeuvring a fully topped pizza onto the peel in the first place. To eliminate that issue, I always top my pizza on a slice of parchment paper so I can slide it around with confidence.
The second essential element is resting the dough in the fridge overnight. As bread dough rests, the flavour develops and the flour fully hydrates in the moisture making for a moister bread. In the case of pizza, that means a nice chew in the crust and a crispy base. With that in mind, you might be led to believe that if you rest your dough for longer then your pizza will be better… and you’d be absolutely right! And when a dish is made of just bread dough, mozzarella and tomatoes, why would you not employ the overnight rest tactic to impart the best flavour possible to the dough itself? It is the difference between “yum, this pizza’s nice” and “WOW! This pizza’s DELICIOUS!”
Of course, we could always skip these things. We could bake on a tray and make the dough and bake it on the same day. But effort is always rewarded, and shortcuts always come with a compromise in terms of flavour, texture or both. That’s the lesson pizza teaches us. Patience, care and attention always pay off.
Shaping a pizza can be fun but it can be a source of worry too, so here are some pointers from me:
- Do not under any circumstances use a rolling pin. I know pizza is meant to be flat, but a rolling pin will flatten out all those teeny tiny air bubbles and your pizza will be chewy and dense and doughy. Use your hands, press with fingertips leaving a crust around the edge and coax the pizza into a disk by lifting and stretching, working your way around the edge.
- If your dough resists your attempts to stretch it just leave it alone for a bit. The gluten is springy and tense and it needs time to relax. Let it sit for a few minutes by itself and when you return it’ll be far more welcome to your efforts.
- Don’t stress out about making it a perfect circle. If it is a weird oval or a map of Africa please don’t worry. It’s your pizza and you made it – if you want it to look like it came from a packet, buy one in a packet.
From the book
Buy From
Pizza Margherita
Ingredients (makes 5 pizzas)
For the pizza dough base:
310g (11oz) room temperature water
4g (1 teaspoon) fresh yeast, crumbled, or 2g (½ teaspoon) fast-action dried yeast
500g (1lb 2oz) strong white bread flour, plus extra for dusting
8g (¼oz) salt
For the pizza sauce:
350g (12oz) jar passata (puréed tomatoes)
Pinch of sugar, if needed
Pinch of dried oregano
1 tbsp olive oil, plus extra for drizzling
For the topping:
375g (13oz – 2½ x 150g/5½oz balls) mozzarella cheese (drained weight), for topping
A large handful of fresh basil leaves
Salt and cracked black pepper
You’ll need: a baking or pizza stone and a wooden peel.
Method:
DAY ONE
Making the dough: 10–15 minutes
1. In a large mixing bowl, mix together the water and yeast until the yeast has dissolved.
2. Add the flour and salt, then mix with a dough scraper until the mixture comes together into a cohesive dough with no obvious wet or dry patches.
Resting: 1–1. hours
3. Shape the dough into a ball and place it back in the bowl. Sprinkle the top with a little flour, cover with a clean cloth and rest for 1–1½ hours.
Folding: 5 minutes
4. Dust the work surface lightly with flour and turn the dough out upside down onto it, sticky side up.
5. Use your fingertips to flatten the dough slightly. Grasp a bit of the dough edge, stretch it out and then fold it over onto the dough. Repeat all the way round the dough, making about 12–15 folds, until you have a ball.
Resting: 1–1½ hours
6. Turn the dough over, smooth side up, and place it back in the bowl. Cover with the cloth and rest for 1–1½ hours.
Dividing and pre-shaping: 5–10 minutes
7. Dust the work surface and the top of the dough lightly with flour and use your dough scraper to turn it out onto the dusted surface. Cut it into 5 equal-sized pieces with your dough scraper. If you want them all to be exactly the same size, weigh them out at about 165g (6oz) each. Fold and roll each piece of dough into a tight ball (see page 24).
Resting: Overnight
8. Line up your dough balls on a tray, dust with flour and cover loosely with cling film or another upturned tray. Place the tray in the fridge and rest overnight.
DAY TWO
Preparing the sauce and topping: 5–10 minutes
9. Pour the passata into a bowl and season with salt to taste. Some passata is quite acidic, so you may need a little sugar just to take the edge off. Then stir in the oregano and olive oil and set aside.
10. Drain the mozzarella of its water, tear into pieces and place on a plate lined with kitchen paper. Cover with another sheet of kitchen paper and place in the fridge to dry slightly. Making your pizza base: 30–45 minutes
11. When you are ready to make your pizzas, preheat your oven to 230°C fan/485°F/Gas Mark 9 with a baking or pizza stone on the middle shelf for 30–45 minutes to get that stone nice and hot. Traditional pizza ovens are ridiculously hot, so if your oven goes higher than mine and you’re confident it has an even heat throughout, crank it up!
12. Meanwhile, stretch out your pizza dough, which should be slightly puffy and should have spread a little.
13. Dust the work surface lightly with flour. Working with one at a time, dust a dough ball well with flour and use a dough scraper to lift it from the tray onto the dusted surface.
14. Using your thumbs, press the dough down all round the edge, dimpling it just inside where you imagine the crust to be. Then using your fingertips, push down on the domed middle to flatten it. Pass the dough from hand to hand, stretching it out evenly into a circle about 25cm (10in) wide. You might find it easier to grasp the dough by the edge just inside the crust and work your grasp all the way round the edge, letting the weight of the dough hanging down to do the stretching for you. Or spin it in the air, catching it on your knuckles in between! Place your pizza base on a piece of baking parchment.
Adding the sauce and topping: 5 minutes
15. Place 2 tablespoons of the sauce in the centre of the pizza base. Using the back of the spoon, spread it round in a circle, working your way out to the inside edge of the crust. Top with a few pieces of mozzarella (75g/2½oz per pizza) and season with a little salt and cracked black pepper. Add a drizzle of olive oil.
Baking: 5–10 minutes each
16. Slide your dough on the paper onto your wooden peel and slide it onto the hot stone in the oven, paper and all. Depending on the temperature of your oven, the pizza will take around 5–10 minutes to bake until browned on the top and crisp on the base. If you can, slide out the paper halfway through baking, but if not, it will quite happily stay there until the end of baking.
17. Remove your pizza from the oven with your peel and slide it onto a wire rack. Remove the paper if you haven’t already.
18. I like to let my pizza rest for 5 minutes or so before cutting, just to keep the base nice and crisp – you won’t be able to eat it straight away without burning your mouth anyway! Scatter over a few basil leaves before serving.
Jack Sturgess is the author of the essential, accessible guide to bread-baking, Bread Every Day. If you loved this recipe, you’ll find plenty more in Jack’s cookbook, alongside illustrated step-by-step instructions, guides on kit and key techniques, and delicious ways to help you get the most out of your bread, from sandwiches to salads, breakfasts to desserts.
Find this recipe and more in

