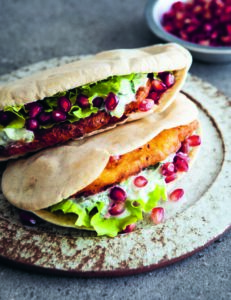
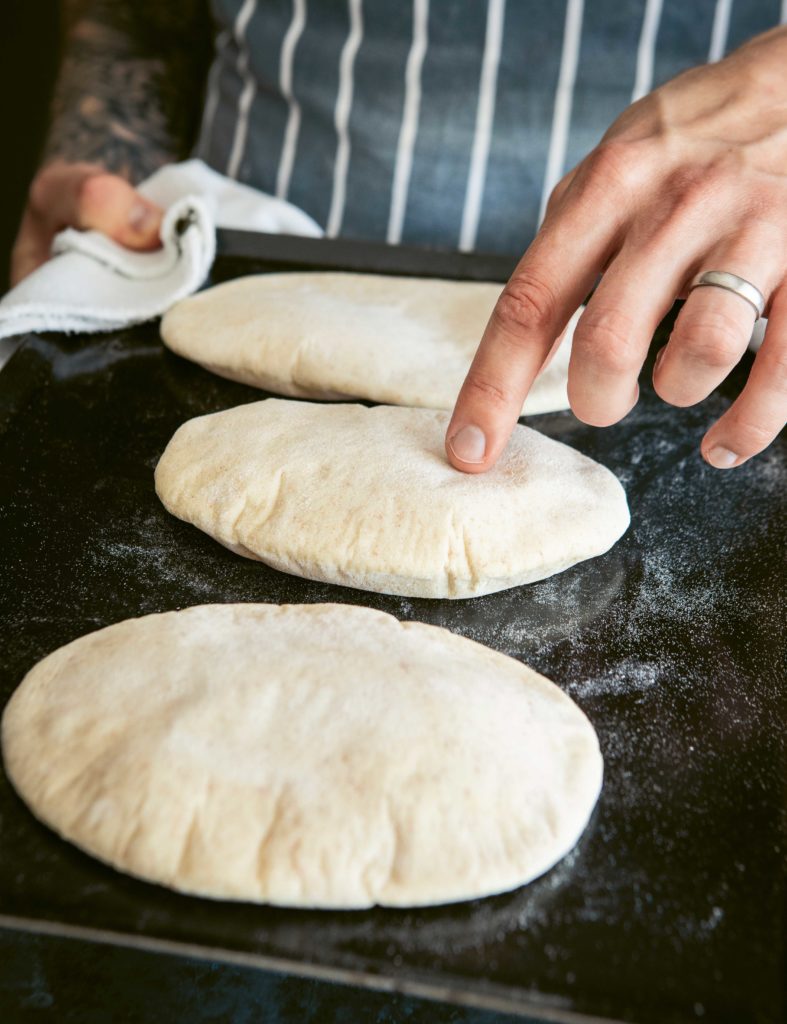
“How do you get the hole in the middle of a pitta bread?” is a question I get asked regularly in class. Fold the dough in half? Layer it with oil? The real answer is that you don’t need to do anything at all, the hole just happens all by itself! Something magical happens if you roll a piece of yeasted dough out nice and thin and bake it on something hot in the oven (like a pre-heated tray or a baking stone). First, the disk of dough inflates slightly, plumping up, and then it puffs up like a ball balancing on its now rounded bottom with the perfect pocket inside. And all this happens in just four minutes.
Shop-bought pitta bread kind of has pockets, right? You put one in the toaster then shimmy a small knife down the edge in an attempt to open it out without piercing the side while the pita splits and crumbles into flakes on the table. But when homemade pittas puff, the pocket is so perfect it’s just begging to be filled without any of that faff.
A little yoghurt in this recipe brings that acidic tang we all expect from our pitta bread; even right after you’ve mixed the dough it already smells like a pitta. Be sure to bake these with no colour. The reason for this is because when you are about to fill your pitta I imagine you’ll want to pop it in the toaster first – I sure do. If we bake it until it’s golden and then toast it, it will turn into a crisp (pitta crisps are still delicious but no good for filling!). Baking for such a short time keeps it soft; perfect for stacking and freezing in a bag, ready for you to take as you need straight from the freezer and into the toaster. The short baking time means this is a bread you can whip up relatively quickly in batches to top up your freezer for your weekly lunches. All these things combined make pittas super practical and fundamental in our house.
Do be careful though. The magic that makes them puff is steam – your pitta pocket will be full of hot steam that will try an escape from tiny holes, be sure to wear oven gloves or use a heavy cloth when retrieving puffy pitta pillows from your oven to avoid burning yourself. Do have fun too -watching in anticipation as your pitta puffs is an essential part of the process.
From the book
Buy From
Pitta Bread
Ingredients (makes 12 pitta breads):
170g (6oz) room temperature water
200g (7oz) natural set
Greek yoghurt
12g (½oz) fresh yeast, crumbled, or 7g (¼oz) fast-action dried yeast
450g (1lb) strong white bread flour, plus extra for dusting
50g (1¾oz) strong
wholemeal bread flour
8g (¼oz) salt
10g (½oz) olive oil
Making the dough: 15–20 minutes
1. In a large mixing bowl, mix together the water, yoghurt and yeast until the yeast has dissolved.
2. Add the flours and salt, then mix with a dough scraper until the mixture starts to come together. Add the olive oil and mix again into a rough dough.
3. Turn your dough out onto a clean work surface and knead without any additional flour for 8 minutes.
Resting: 1–1. hours
4. Shape the dough into a ball and place it back in the bowl. Sprinkle the top with a little flour, cover with a clean cloth and rest at room temperature for 1–1. hours.
Dividing and pre-shaping: 5–10 minutes
5. Dust the top of the dough lightly with flour and use your dough scraper to turn it out upside down onto the work surface, sticky side up.
6. Use your fingertips to flatten the dough gently and cut it into 12 equal-sized pieces with your dough scraper. If you want them all to be exactly the same size, weigh them out at about 75g (2½oz) each. Fold and roll each piece of dough into a tight ball (see page 24).
Resting: 20–30 minutes
7. Line up your dough balls on the work surface or on a tray. Dust only the tops with flour, cover them with the cloth and rest for 20–30 minutes to relax and spread slightly.
8. Towards the end of resting, preheat your oven to 200C fan/425F/Gas Mark 7 with a baking tray on the middle shelf.
Shaping and baking: 20–30 minutes
9. Using a rolling pin and plenty of flour for dusting, roll out 3 dough balls into oval shapes, about 20cm (8in) long and 12cm (4½in) wide.
10. Place the pittas on the hot baking tray and bake for 4 minutes until puffed up like glorious bread pillows.
11. Using a heavy cloth, oven glove or a wooden peel, remove the pittas very carefully from the oven and place them on a wire rack to cool completely and deflate. They will be full of steam and very, very hot, and the steam often escapes somewhere on the pitta, so beware of little jets of steam that will burn.
12. Repeat with the remaining dough balls until all your pittas are baked.
Jack Sturgess is the author of the essential, accessible guide to bread-baking, Bread Every Day. If you loved this recipe, you’ll find plenty more in Jack’s cookbook, alongside illustrated step-by-step instructions, guides on kit and key techniques, and delicious ways to help you get the most out of your bread, from sandwiches to salads, breakfasts to desserts.
Find this recipe and more in

