Jamie Oliver’s Simple Chocolate Tart
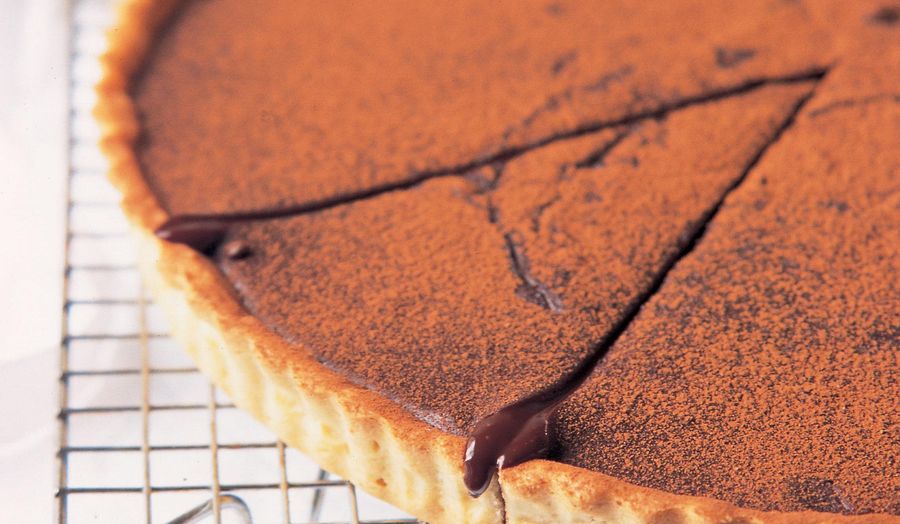
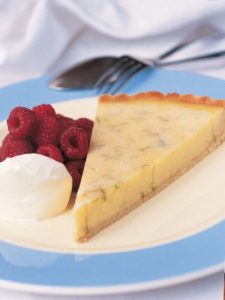
The ultimate decadent dessert, Jamie Oliver’s timeless recipe for a Simple Chocolate Tart is a fail-safe option to impress your guests at a dinner party for an indulgent treat that tastes as delicious as it looks.
From the book
Buy From
Introduction
This chocolate tart is great for those chocofreaks who turn up out of the blue as it is dead quick to make. I think this particular tart cries out for a slightly thicker pastry shell. The better the chocolate you can buy, the tastier it will be.
Ingredients
| For the Short Crust Sweet Pastry (to make 2 × 30cm/12 inch tart moulds): | |
| 250g/9oz | butter |
| 200g/7oz | icing sugar |
| A medium pinch | salt |
| 500g/just over 1lb | flour |
| 4 | egg yolks |
| 4 tbsp | cold milk/water |
| For the chocolate filling: | |
| 1 | tart shell (see ingredients above) baked blind (see instructions) |
| 315ml/11fl oz | double cream |
| 2 level tbsp | caster sugar |
| The smallest pinch | salt |
| 115g/4oz | butter, softened |
| 455g/1lb | best-quality cooking chocolate, broken up |
| 100ml/3¾fl oz | milk |
| Cocoa powder for dusting |
Essential kit
You will need: 2 × 30cm/12 inch tart moulds.
Method
Making the dough:
You can make this pastry by hand or in a food processor. Cream together the butter, sugar and salt and then rub or pulse in the flour and egg yolks. When this mixture has come together, looking like coarse breadcrumbs, add the cold milk or water. Pat and gently work together to form a ball of dough. Lightly flour and push, pat and squeeze into shape. The idea is to get your ingredients to a dough form with the minimum amount of movement, i.e. keeping your pastry flaky and short (the more you work it the more elastic it will get, causing it to shrink in the oven and be chewy – ooooh no, matron).
Allowing to rest:
I normally roll the pastry into a really large, short and fat sausage-shape, wrap it in cling-film and place it in the fridge to rest for at least 1 hour.
Lining the mould:
Carefully slice off thin slivers of your pastry (don’t try to slice frozen pastry) lengthways, around 5mm/1/8 thick. (I personally like it around that thickness as it’s delicate, but you can make it thicker if you want, it just takes longer to cook). Place the slivers in and around the bottom and sides of your tart mould, just fitting them together like a sort of jigsaw. Then simply push the pieces together, level out, then tidy up the sides by pushing with your thumb and either cleaning off the excess pastry from the rim of the mould, or allowing it to hang over the edge – which is quite rough but I like it. Once you’ve finished lining your tart mould you must again allow it to rest for at least an hour, preferably in a freezer (I always store my pastry in the freezer because it keeps so well). I always line two tart moulds and freeze one for another day (or you could make more if you want, just double the recipe, as it takes no extra time). It’s so easy to grab a tart out of the freezer, bake it in minutes and fill it with something simple or elaborate, and if guests turn up or you just want to make a nice dessert, it makes pudding a piece of cake!
Baking the tart:
To start with I always bake tart shells for around 15 minutes at 180˚C/ 350˚F/gas 4 which will cook the tart all the way through, colouring it slightly.
Once completely cooled it can be filled with any of the uncooked fillings, such as Fruit-filled Mascarpone Tart and Simple Chocolate Tart (see below) which will hopefully provide a basis for you to make up and vary your own.
You’ll have to bake the tart blind first, which means cooking the shell at 180˚C/350˚F/gas 4 but only for about 12 minutes, so that it’s only lightly coloured but just cooked through. Another way, commonly used, is to fill the tart shell with clingfilm or greaseproof paper and fill it with beans (you can use rice, lentils, peas, whatever), the idea being that you pack the beans in so tightly that they will stop the sides of the pastry from dropping. Cook for 10 minutes and then carefully remove the beans and cook for a further 5–10 minutes. Yes, this is a bit of a performance and I only ever do it when I’m having bad luck, quite honestly if you take your tart shell straight out of the freezer and place it in a preheated oven you shouldn’t have any problems.
After baking blind, you add your filling and bake further until the filling is cooked (see recipes for cooking times).
To make the chocolate tart:
Place the double cream, sugar and pinch of salt in a pan and bring to the boil.
As soon as the mixture has boiled, remove from the heat and add the butter and chocolate. Stir until it has completely melted. Allow the mixture to cool slightly, stirring in the cold milk until smooth and shiny. Sometimes this mixture looks like it has split. Allow to cool down a bit more and whisk in a little extra cold milk until smooth. Scrape all the mixture into the cooked and cooled pastry shell with a spatula. Shake the tart to even it out and allow to cool for around 1–2 hours until it is at room temperature. Dust with the cocoa powder. Ultimately the pastry should be short and crisp and the filling should be smooth and should cut like butter.
CALS 436 kcal FAT 32.9g SAT FAT 20g PROTEIN 4.8g CARBS 30.2g SUGAR 16.4g SALT 0.1g FIBRE 3.6g
Reviews
2 Ratings
Have you tried this recipe? Let us know how it went by leaving a comment below.
Our team will respond to any queries as soon as we can - this may take longer over weekends. You do not need to resubmit your comment.
Please note: Moderation is enabled and may delay your comment being posted. There is no need to resubmit your comment. By posting a comment you are agreeing to the website Terms of Use.

